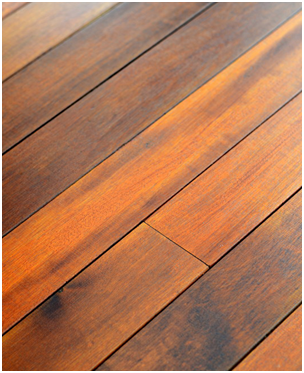
Restoration
Your timber deck has its own unique characteristics… after all, it is made of wood, a 100% natural product.
So depending on your situation, your deck could be subjected to a whole lot of different weathering elements including heavy rain, the atmosphere, heat, frost and UV radiation from the sun. This endless daily cycle accumulates and breaks down the timber’s cell structure, turning it gray, and eventually warping, cracking, cupping and splintering it. Turning what was once a beautiful deck into an ugly, safety hazard.

To restore your deck to its former state of beauty, we first have to remove any old treatments, remaining tannins or grey colour (the broken down surface of the wood). Depending on the severity of the degradation and condition of the timber, we may have to sand the surface back to reveal the wood underneath that has not been affected.
If the damage is not too severe, we may use a two stage cleaning process and pressure wash to get back to bare wood before applying a protective coating.
From the time you call us, the restoration process is a simple 14 step procedure:
Step 1 – Scheduling Your Appointment
Our friendly office staff will contact you to arrange a personal visit by one of our Timber Restoration Specialists at a time that is convenient for both parties.
Step 2 – Keeping to the schedule
A Timber Restoration Specialist will arrive at the agreed time. If, for any reason, unforeseen circumstances prevents us from being on time as scheduled, we will always contact you prior to the meeting and give you the option to reschedule
Step 3 – Appraising the restoration
The Timber Restoration Specialist will appraise the current condition of your exterior timber. Timber is a natural but varied product. All timbers behave differently depending on their environment and therefore require different levels of care. Our experienced staff will assess your individual situation and recommend the best restoration process for your specific needs. This will save you money by eliminating any unnecessary tasks and offering the most economical solution tailored to your individual needs.
Step 4 – Answering your questions
The Specialist will answer any questions you have and measure up the total surface area of the timber, noting any specific areas that require additional or special attention. This is to ensure any necessary repairs can be done prior to the main restoration process, as this gives a much better end result. Your choice of colour is also discussed at this time.
Step 5 – Quotation and recommendations
Once the initial appraisal is complete, we then compile a detailed quote listing all the necessary processes required to restore your timber area and send it to you. The quote will include the recommended procedures and pricing for each stage of the process, allowing you to make a truly informed decision.
Step 6 – Scheduling the project
Once confirmation and acceptance of the quote is received, our staff contact you to discuss a suitable start date that works with your individual schedule. This allows you time to consider arrangements for your pets, holidays or access during work hours. Once a date is agreed, we then email or post you confirmation of the booking dates in writing.
Step 7 – Planning the project
24-48 hours before your booking date, our office staff contact you to discuss access arrangements, keys and pet issues. We also inform you of the necessary tasks you will need to attend to prior to our visit such as clearing all pot plants, furniture and overhanging plants, etc. This ensures no areas will be missed, plants damaged or furniture scratched during the restoration process. Confirmation of colour choice is also discussed to ensure the technician arrives with the correct products to suit your individual project.
Step 8 – Site inspection
Upon arrival, the Restoration Specialist confirms all quoted work to be done, identifies any plant or danger issues and commences the restoration process.
Step 9 – Sanding and dust extraction
Sanding of the deck is often required. Sanding will remove any grey, dead timber cells, any old coatings as well as remove any cupping or warping that may have occurred due to sun and water damage. Sanding is done using our top of the range sanding equipment. Dust Extraction is standard on all our equipment with 95% of dust removed within the initial process. Any residual dust is removed in the subsequent processes. This means no mess in your home or on your washing but leaves you with fresh raw timber.
Step 10 – Cleaning the timber
Stage 1 of the 2 stage cleaning process involves application of Powerlift. This very mild, oxygen based cleaning agent helps remove any residual oils, dirt and tannins that naturally occur in the timber fibres. This is important and allows even penetration of the final coating product. This is applied, left for 15 minutes or so before being scrubbed with our Industrial scrubber and rinsed clean.
Step 11 – Preparing the surface
Stage 2 of the cleaning process is the application of the WoodPrep solution. This process is important and helps brighten the timber to highlight the natural grain. It also prepares the wood by “opening’ the fibres and allowing the final product to better adhere or “ key’ to the timber. This is the secret to longer lasting protection that won’t lift or peel. Again, it is applied, left for 15 mins to really work on the timber fibres and then scrubbed for a second time. A final rinse with high pressure water finishes the 2 stage cleaning process.
Step 12 – Protection Coating
Application of your protection coating starts immediately. There is no need to wait days for the timber to dry as is the case with nearly every other coating product on the market. Our unique water based acrylic actually “ keys” into the timber fibres creating a strong bond that is hard to break. Once dry, (on average initial drying time is around 1-2 hours) the second and subsequent coats can be applied in succession with drying times between coats as little as 1 hour. This unique process allows us to sand, clean and coat in the shortest possible time and with the least amount of disruption to your busy schedule. We highly recommend a fourth protection coating in full sun, heavy traffic or active pet situations. This helps protect the timber for longer and lengthen the time between maintenance coats.
The final coat will be touch dry in 30 minutes, but we recommended that you keep any pets and traffic off the coated areas for a minimum of 24hours.
Step 13 – Comprehensive Care and Maintenance Pack
Once everything is complete, you will receive a pack that gives you the tools and information you need to easily care for your new protective coating and allow you to get the most out of it
Step 14 – First Anniversary Audit and Recommendations
On the first anniversary of your restoration, we will contact you to allow us to conduct a comprehensive audit of your timber deck’s condition and performance after the first year.
Different decks will wear and age at different rates, depending on the use they get and the amount of sunlight and rain they are exposed to. Based on the condition of the protective coating we will assess the lifecycle of it and plot a maintenance schedule that will ensure your timber deck looks good and lasts a lifetime!
So within 2 – 3 days you can once again enjoy your magnificent timber outdoor entertainment area, secure in the knowledge that it has been properly restored and is covered by our 100% Satisfaction Guarantee!
ACT NOW
15 point safety audit as soon as possible.


